


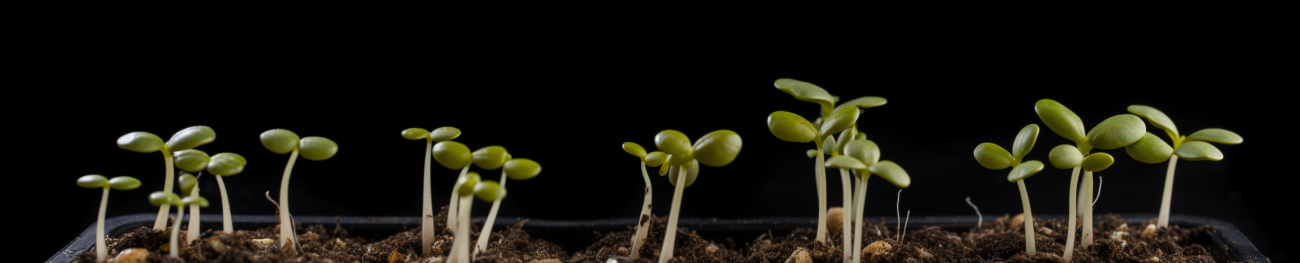
One of the essential skills every gardener should possess is knowing how to germinate seeds. It’s the foundational step that sets the stage for vibrant, flourishing plants. In this comprehensive guide, we will delve into the fascinating world of seed germination and show you how to germinate seeds like a pro. Whether you’re a beginner or an experienced gardener, mastering the art of seed germination will open up a world of possibilities for your garden. Get ready to embark on a journey of discovery as we explore the step-by-step process of how to germinate seeds and unlock the potential of your garden.
Navigating This Article:
Germinating seeds is a crucial step in the process of growing healthy and vibrant plants. Whether you’re starting a new garden or looking to expand your existing one, understanding how to germinate seeds properly can significantly increase your chances of success. In this article, we will explore various techniques and methods for seed germination, including pre-soaking, different germination techniques, and the use of plastic wrap to aid in the process.
Introduction
Growing plants from seeds is an exciting and rewarding experience. Germination is the process by which a seed transforms into a new plant, and it is the first step in the growth cycle. By providing the ideal conditions for germination, you can give your seeds the best chance of sprouting and developing into healthy seedlings.
Why Germinating Seeds is Important
Germinating seeds before planting offers several advantages. Firstly, it allows you to assess the viability of the seeds. Not all seeds are viable, and by germinating them beforehand, you can identify the ones that will successfully sprout. Additionally, germination gives seeds a head start by initiating the growth process in a controlled environment, providing optimal conditions for early development.
Pre-Soaking Seeds
Pre-soaking seeds is a technique that can enhance germination rates, particularly for certain types of seeds. This process involves soaking seeds in water before planting them. Here are the benefits of pre-soaking seeds and how to do it:
Benefits of Pre-Soaking Seeds
Pre-soaking seeds offers several benefits. It softens the seed coat, allowing water to penetrate more easily and kick-starting the germination process. Some seeds, especially those with hard shells, have built-in mechanisms to prevent water absorption. Pre-soaking can overcome these barriers and promote successful germination.
How to Pre-Soak Seeds
To pre-soak seeds, follow these steps:
- Place the seeds in a container.
- Add water to cover the seeds completely.
- Allow the seeds to soak for the recommended time (varies depending on the seed type).
- After soaking, drain the water and plant the seeds as directed.

Germination Techniques
There are various techniques for seed germination, and the choice depends on the type of plant and your preference. Here are three commonly used methods:
Direct Sowing
Direct sowing involves planting seeds directly into the soil where they will grow. This method is suitable for seeds that have relatively high germination rates and do not require pre-soaking or additional care.
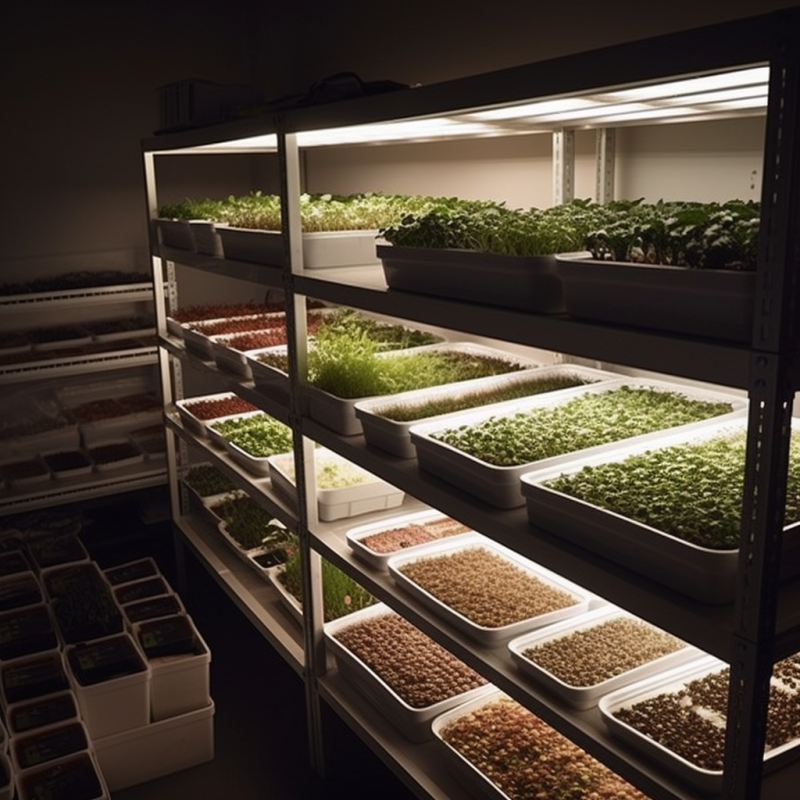
Indoor Germination
Indoor germination is a popular method, especially when starting seeds early or in regions with shorter growing seasons. It allows you to control environmental conditions, providing optimal warmth, moisture, and light for successful germination. Here’s how to germinate seeds indoors:
- Fill seed trays or pots with a well-draining seed-starting mix.
- Moisten the soil, ensuring it is evenly damp but not soaked.
- Place the seeds on the soil surface, following the recommended spacing.
- Gently press the seeds into the soil, making sure they have good contact.
- Cover the trays with plastic domes or place them in plastic bags to create a mini greenhouse effect.
- Position the trays in a warm location, ideally around 70-75°F (21-24°C).
- Check the trays daily and remove the cover once the seeds have sprouted to provide airflow.
- Keep the soil moist by watering gently from the bottom or using a spray bottle.
- As the seedlings grow, provide adequate light by placing them near a sunny window or using grow lights.
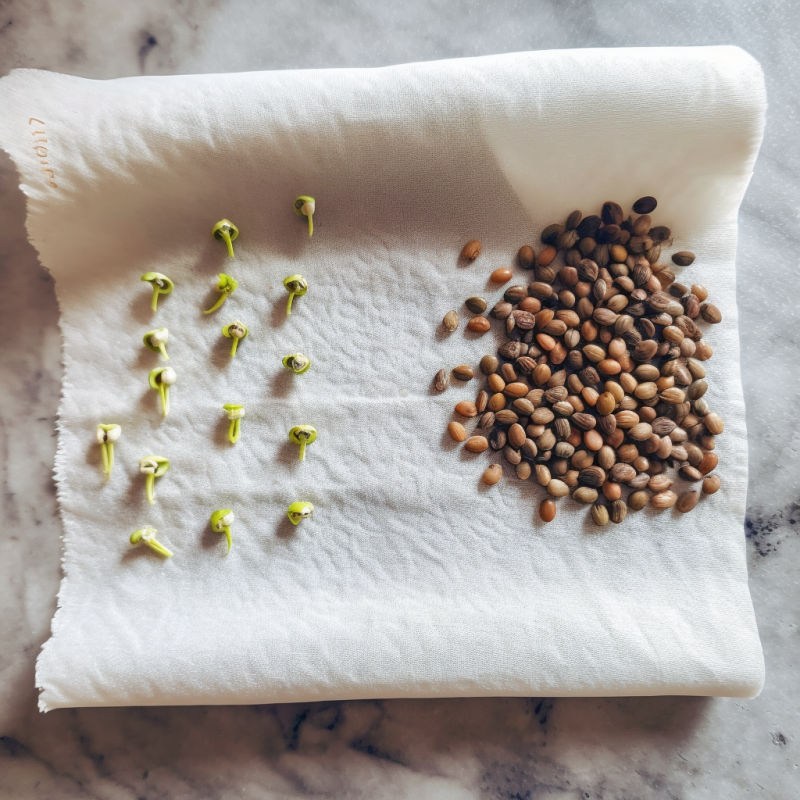
Paper Towel Method
The paper towel method is useful for testing seed viability and germinating seeds that require special care. Here’s how to use this technique:
- Moisten a paper towel or coffee filter with water.
- Place the seeds evenly spaced on one half of the towel.
- Fold the towel over to cover the seeds and gently press it to ensure contact.
- Transfer the towel to a sealable plastic bag or a covered container.
- Keep the bag/container in a warm location, ideally around 70-75°F (21-24°C).
- Check the seeds regularly for signs of germination.
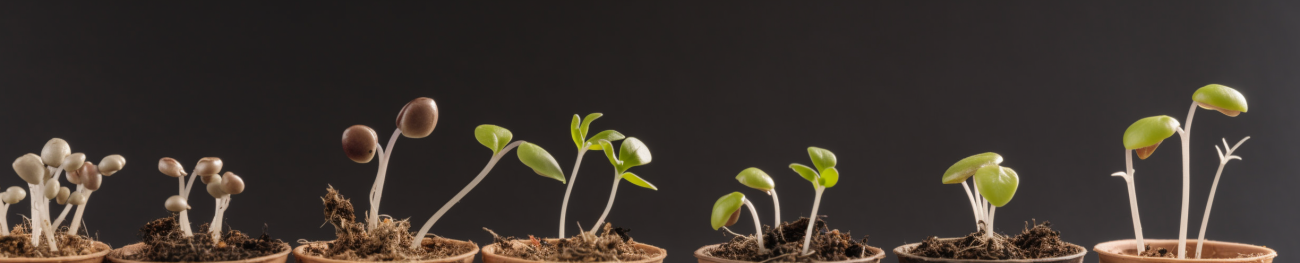
- Once the seeds have sprouted, carefully transfer them to pots or trays for further growth.
Factors Affecting Germination
Several factors influence the germination process. Understanding these factors and providing the appropriate conditions can greatly improve seed germination rates. The main factors to consider are:
Temperature
Different seeds have specific temperature requirements for germination. Some prefer cooler temperatures, while others require warmth. It’s important to research the optimal temperature range for the seeds you’re germinating and provide suitable conditions.
Moisture
Seeds need moisture to germinate, but it’s crucial to strike a balance. Overwatering can lead to rot, while underwatering can hinder germination. Keep the soil consistently moist but not waterlogged.
Light
Light requirements vary among seeds. Some need light to germinate, while others prefer darkness. Research the light requirements of your specific seeds and provide the appropriate conditions.
Airflow
Adequate airflow is essential for healthy germination. It prevents the buildup of excess moisture, which can lead to mold or fungal issues. Ensure proper ventilation by removing coverings or opening vents as soon as the seeds sprout.
Covering Seeds with Plastic Wrap
Covering seeds with plastic wrap can create a favorable microclimate, promoting germination. Here’s why and how to cover seeds with plastic wrap:
Purpose of Covering Seeds
Plastic wrap helps create a mini greenhouse effect, trapping moisture and heat around the seeds. This environment mimics the conditions seeds need for successful germination. It also provides a physical barrier, protecting the seeds from drying out or being disturbed.
How to Cover Seeds with Plastic Wrap
- After planting the seeds, place a piece of plastic wrap loosely over the seed tray or pot.
- Ensure the wrap is large enough to cover the entire surface and provide room for seedling growth.
- Press the edges of the plastic wrap gently into the soil to create a seal without compressing the soil.
- Make small holes or slits in the plastic wrap to allow for airflow and prevent excessive condensation.
- Place the seed tray or pot in a warm location with indirect light.
- Once a day, briefly remove the plastic wrap to provide airflow and prevent the buildup of moisture.
- Check the moisture level of the soil regularly and water as needed.
- Once the seeds have sprouted and established, remove the plastic wrap entirely to promote healthy growth.
Germination Tips and Tricks
To maximize the success of seed germination, consider the following tips and tricks:
- Maintaining Optimal Conditions: Monitor and maintain the ideal temperature, moisture, light, and airflow for the specific seeds you’re germinating. Consistency is key.
- Providing Adequate Watering: Water the seeds gently and avoid overwatering. Ensure the soil remains moist but not waterlogged to prevent rot or mold.
- Using Seedling Heat Mats: Seedling heat mats can provide consistent warmth to promote germination. Place the seed trays or pots on the heat mat following the manufacturer’s instructions.
- Monitoring and Adjusting: Regularly check on the progress of your germinating seeds. If conditions need adjustment, such as increasing or decreasing temperature or adjusting moisture levels, make the necessary changes promptly.
Common Mistakes to Avoid
Avoiding common mistakes can greatly improve the success of seed germination. Here are a few to watch out for:
- Overwatering: Excessive moisture can lead to rot and fungal issues. Water the seeds judiciously, maintaining a moist but not soggy environment.
- Neglecting Temperature Control: Failure to provide the appropriate temperature range for your seeds can impede germination. Research the ideal temperatures and adjust accordingly.
- Insufficient Light: Some seeds require light for germination. Ensure adequate light exposure for those seeds, either through natural sunlight or grow lights.
- Ignoring Airflow: Proper ventilation is crucial for preventing the buildup of excess moisture and the development of mold or fungus. Allow for airflow once the seeds have sprouted.
Conclusion
Germinating seeds for planting is an essential skill for successful gardening. By understanding the importance of pre-soaking, utilizing different germination techniques, and considering factors like temperature, moisture, light, and airflow, you can significantly increase your chances of successful germination. The use of plastic wrap to create a favorable microclimate can also aid in the germination process. Remember to monitor and adjust conditions as needed, and avoid common mistakes such as overwatering or neglecting temperature control. With proper care and attention, you’ll be rewarded with healthy seedlings ready for transplanting into your garden.
FAQs
- How long does it take for seeds to germinate? The germination time varies depending on the type of seed. Some seeds may sprout within a few days, while others can take weeks.
- Can all types of seeds be pre-soaked? Not all seeds require pre-soaking. It is beneficial for seeds with hard shells or those that benefit from increased water absorption.
- Should I remove plastic wrap once the seeds have sprouted? Yes, it’s important to remove the plastic wrap once the seeds have sprouted to provide adequate airflow and prevent excessive moisture buildup.
- Do different plants require different germination techniques? Yes, different plants have varying germination requirements. Some may prefer direct sowing, while others may benefit from indoor germination or specific techniques like the paper towel method.
- Can I reuse the plastic wrap for multiple batches of seeds? It is generally recommended to use fresh plastic wrap for each batch of seeds to maintain cleanliness and prevent potential contamination.
Detailed Guides for Planting Vegetables, Herbs, Greens & Lettuce, Peppers, and Wildflowers:
At FarmerValley we offer detailed guides for planting vegetables, herbs, greens & lettuce, peppers, and wildflowers. These guides provide step-by-step instructions for planting and caring for your plants, as well as tips for getting the best results. Check our growing guides and plant your own non-GMO garden with confidence.
Planting non-GMO seeds is a great way to enjoy fresh and healthy vegetables and herbs while also knowing that you’re avoiding harmful additives. With these essential tips and top lists, as well as our detailed guides, you’ll be on your way to a bountiful harvest in no time.