


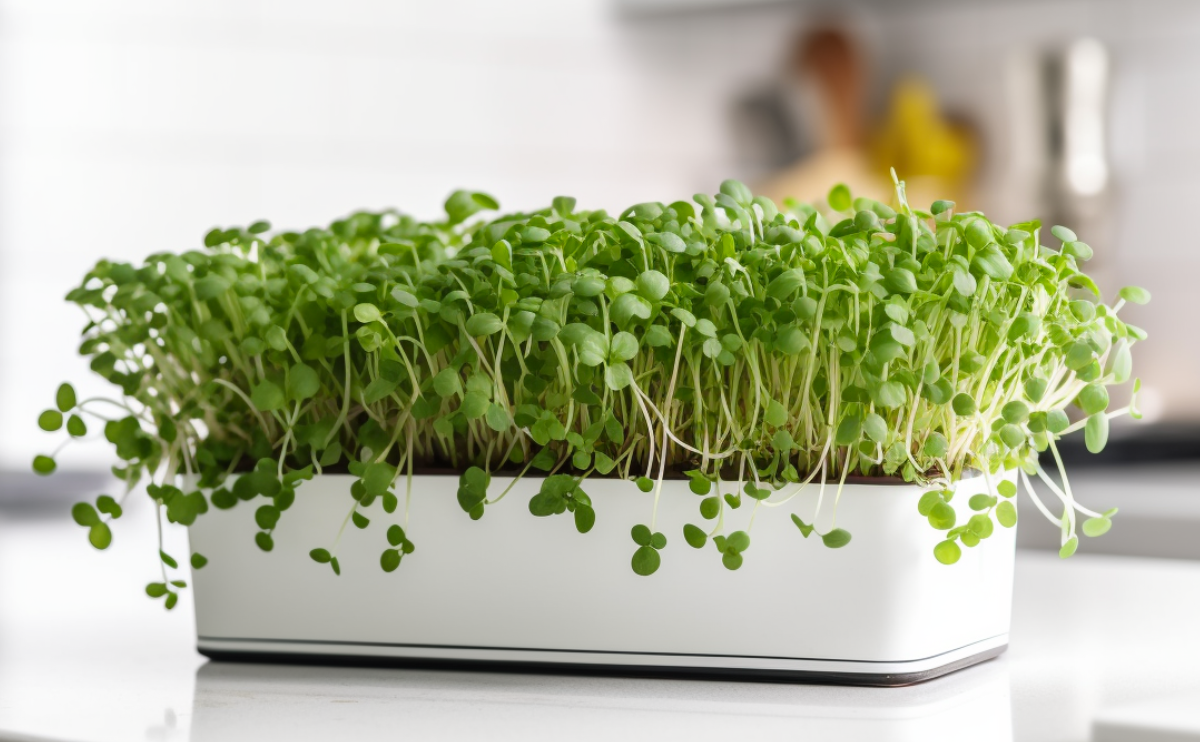
Are you ready to embark on a green journey that is not only delicious but also incredibly rewarding? Look no further than growing your own cress microgreens! These vibrant and flavorful greens are not only a feast for the taste buds but also a feast for the eyes. In this exciting guide, we will take you through the easy steps to grow cress microgreens, turning your gardening experience into a fresh and flavorful adventure!
Supplies to Gather to Plant Cress Microgreens:
To begin your cress microgreen adventure, gather the following supplies:
- Cress microgreen seeds: Choose high-quality cress seeds specifically meant for growing microgreens. Look for non-GMO varieties for the best results. One great option is to visit our FarmerValley store, where we offer a wide selection of heirloom microgreen seeds, including cress. Our seeds are carefully sourced and of the highest quality, ensuring a successful and flavorful microgreen growing experience. So, head over to FarmerValley and explore our collection of cress microgreen seeds to kickstart your fresh and vibrant journey of homegrown microgreens.
- Growing container: Select a container that suits your space and preferences. You can use trays, shallow pots, or even repurpose household items like plastic containers or egg cartons. Ensure the container has drainage holes or line it with a paper towel for proper moisture control.
- Growing medium: Opt for a soilless growing medium such as coco coir, peat moss, or vermiculite. These mediums provide excellent drainage and aeration, promoting healthy root development. Avoid using regular garden soil, as it can become compacted and hinder the growth of delicate microgreens.
- Water source: Have a water source available for watering your microgreens. You can use a watering can, spray bottle, or any other method that allows for gentle and precise watering.
- Light source: Microgreens require sufficient light for optimal growth. If you don’t have access to natural sunlight, consider using fluorescent grow lights or LED light panels. Position the lights 2-3 inches above the microgreens for 12-16 hours a day.
- Labels and markers: Keep track of your microgreen varieties by using labels or markers. This will help you identify each tray or container and ensure you harvest them at the right time.

Preparation to Plant Cress Microgreens:
Before planting your cress microgreens, follow these preparation steps:
- Clean and sanitize: Thoroughly clean your growing containers with mild soap and water. Rinse them well to remove any residue. Sanitize the containers by wiping them with a diluted bleach solution (1 part bleach to 10 parts water). Rinse again and allow them to air dry.
- Moisten the growing medium: Pre-moisten the growing medium with water until it’s evenly damp. Avoid soaking the medium, as excess moisture can lead to mold or fungal growth. The goal is to achieve a moist but not soggy consistency.
- Prep the planting area: Choose a suitable location for your microgreens to grow. It can be a sunny windowsill, a dedicated shelf with grow lights, or any area that provides the right balance of light and temperature.
Step-by-Step Guide to Growing Cress Microgreens
Follow these simple steps to cultivate vibrant and healthy cress microgreens:
Step 1: Sow the Seeds
Spread a thick, even layer of pre-moistened growing medium in your chosen container. Sprinkle the cress seeds evenly across the surface, aiming for a dense but not overcrowded distribution. Gently press the seeds into the medium using the palm of your hand or a small tool.
Step 2: Cover and Water
Cover the seeds with a thin layer of the growing medium to help retain moisture and provide darkness for germination. Lightly water the surface using a misting bottle or a gentle stream from a watering can. Ensure the medium remains moist but not waterlogged.
Step 3: Provide Light and Air – Nurturing Growth
Place the container in a well-lit area or under grow lights. Cress microgreens require indirect sunlight or artificial light to thrive. Ensure good air circulation by allowing some space between containers or using a small fan to gently move the air around.
Step 4: Water Regularly
Check the moisture level of the growing medium daily and water as needed to keep it consistently moist. Avoid overwatering, as excessive moisture can lead to damping-off disease or root rot. Use a spray bottle or a watering can with a fine nozzle to provide a gentle and even distribution of water.
Step 5: Watch Them Grow
Keep a close eye on your cress microgreens as they grow. Within a few days, you should start to see tiny green shoots emerge from the soil. Witness the magic of growth as they develop their characteristic cotyledon leaves, which will be followed by their true leaves.
Step 6: Harvest and Enjoy
Once your cress microgreens have reached a height of 2-3 inches and their true leaves have fully developed, it’s time to harvest. Using clean scissors or a sharp knife, cut the microgreens just above the soil level. Rinse them gently to remove any soil particles and pat them dry.
Now, it’s time to savor the bounty of flavor and nutrition that your homegrown cress microgreens offer. Incorporate them into salads, sandwiches, soups, or use them as a garnish for added zest and freshness. Let your culinary creativity shine and enjoy the satisfaction of growing and indulging in these vibrant greens!
Extra Delights: Utilizing the Growing Mat and Seedlings
Don’t let the journey end with the harvest! There’s more to explore:
- Reusing the Growing Mat: After harvesting, remove the remaining roots and any dried-up parts from the growing mat. Compost it or use it as an excellent addition to your garden soil to nourish future plants.
- Seedlings as Tasty Treats: If any seedlings have grown too close together, thin them out and use them in your culinary creations. It’s a bonus treat while you wait for the rest of the microgreens to mature.
Other Ways to Grow Cress Microgreens
While the steps mentioned above outline the traditional method of growing microgreens, there are other creative approaches you can explore:
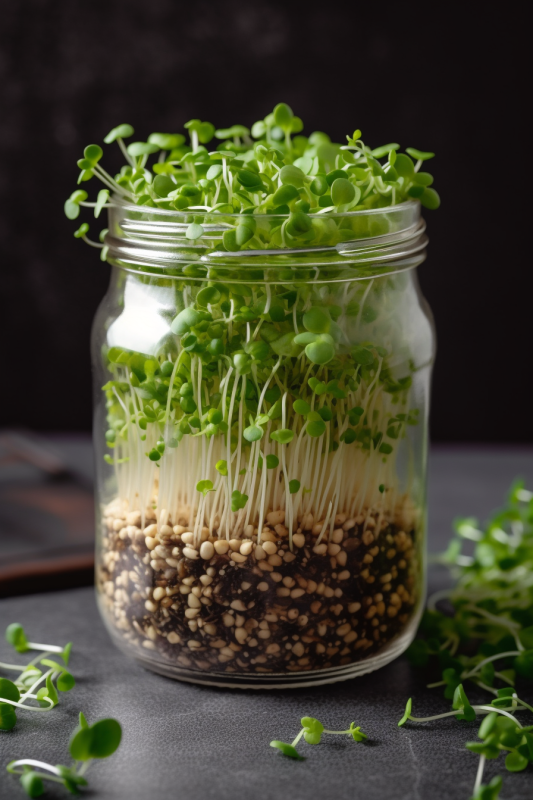
- Jar Sprouting: Place the soaked seeds in a jar with a sprouting lid or a piece of breathable fabric secured with a rubber band. Rinse and drain the seeds twice a day until they sprout. Once sprouted, transfer them to a tray or container with a growing medium to continue the growth process.
- Hydroponic Growing: Utilize a hydroponic system to grow your microgreens without soil. Set up a hydroponic tray with a nutrient-rich water solution and place your seeds on a growing medium like a coconut coir pad or a specialized hydroponic mat. Ensure the roots have access to the nutrient solution for healthy growth.
- Vertical Growing: Maximize your space by growing microgreens vertically. Install a vertical growing system or use shelves with grow lights to provide adequate light for the microgreens. This method allows you to grow a larger quantity of microgreens in a compact area.
Remember, each method may require specific equipment and adjustments to watering and lighting
Detailed Guides for Planting Vegetables, Herbs, Greens & Lettuce, Peppers, and Wildflowers:
At FarmerValley we offer detailed guides for planting vegetables, herbs, greens & lettuce, peppers, and wildflowers. These guides provide step-by-step instructions for planting and caring for your plants, as well as tips for getting the best results. Check our growing guides and plant your own non-GMO garden with confidence.
Planting non-GMO seeds is a great way to enjoy fresh and healthy vegetables and herbs while also knowing that you’re avoiding harmful additives. With these essential tips and top lists, as well as our detailed guides, you’ll be on your way to a bountiful harvest in no time.